
Gain vs Volume: Nailing Microphone Levels For Better Podcasts
When recording your podcast, do you ever find yourself cranking up your volume to rock concert levels only to realize your podcast sounds more like a whispered secret?
If this is you, perhaps you don’t understand gain vs volume conundrum. This can be a confusing concept for podcasters.
So, in this post we’re teaching you the nuances between gain vs volume so that you can achieve optimal recording and monitoring levels.
First, we’ll define what gain is.
Next we’ll define what volume is.
Then, we’ll discuss how they are correlated with each other. Lastly, we’ll teach your how to dial in an optimal amount of gain when recording your podcast so that you get a clean and robust vocal sound.
But first, we want to let you know that we’re Amazon Associates. As Amazon Associates we earn from qualifying purchases. If you buy something through any of the links on this post we earn a commission. This is at no extra cost to you, and the money we make helps us pump out more content.
What Is Gain?
Gain is the amount of amplification you set for your microphone. It’s the strength in which your microphone picks up sound.
In other words, when you adjust your gain you are essentially setting the baseline sensitivity of your microphone.
It’s the strength of amplification going INTO your microphone.
What Is Volume?
Volume controls loudness.
It doesn’t affect the sound that was recorded on the way in. It controls the loudness of sound on the way OUT to your speakers or headphones.
Let’s consider a common scenario: you’re projecting into the microphone at a consistent level, yet the loudness of your voice through your headphones can vary significantly as you adjust the volume.
This change in perceived loudness doesn’t mean you’ve altered the sensitivity (gain) of your microphone. Rather, you’ve adjusted the output of sound, aka the volume.
Imagine turning the volume knob up. Suddenly, your voice blares in your headphones.
Now, image dialing it way down. Quickly, your voice fades and becomes barely audible. These adjustments to volume haven’t changed the sensitivity of your your microphone.
Volume is a personal preference setting when recording and playing back your podcast. It is true that when you adjust the gain you you hear perceived changes in loudness.
However, this is just how loud or soft you think a sound is.
Volume is the actual strength of the sound waves.
Why Gain Settings Matter
Here’s why getting those settings right matters.
Quality Control
Proper gain setting is the first step in ensuring high-quality audio. If the gain is too low, your recording will be too quiet, and you might end up with issues if you try and amplify it later.
If the gain is too high, you risk clipping your recording. This happens when the loudest parts of the audio are cut off, leading to distortion.
Noise Reduction
By adjusting the gain to an optimal level, you minimize background noise and hiss in your recordings. Nobody likes listening to a podcast that’s full of room noise.
Dynamic Range Maximization
Proper gain settings help capture the full dynamic range of your recording. This means both the quietest and loudest parts are recorded with clarity and detail, allowing for a richer and more nuanced sound.
Post-Production Flexibility
When your gain settings are spot on, it gives you more flexibility in post-production. You’ll have a clean signal to work with, making it easier to edit, mix, and master your audio without having to fix issues like noise, distortion, or uneven levels.
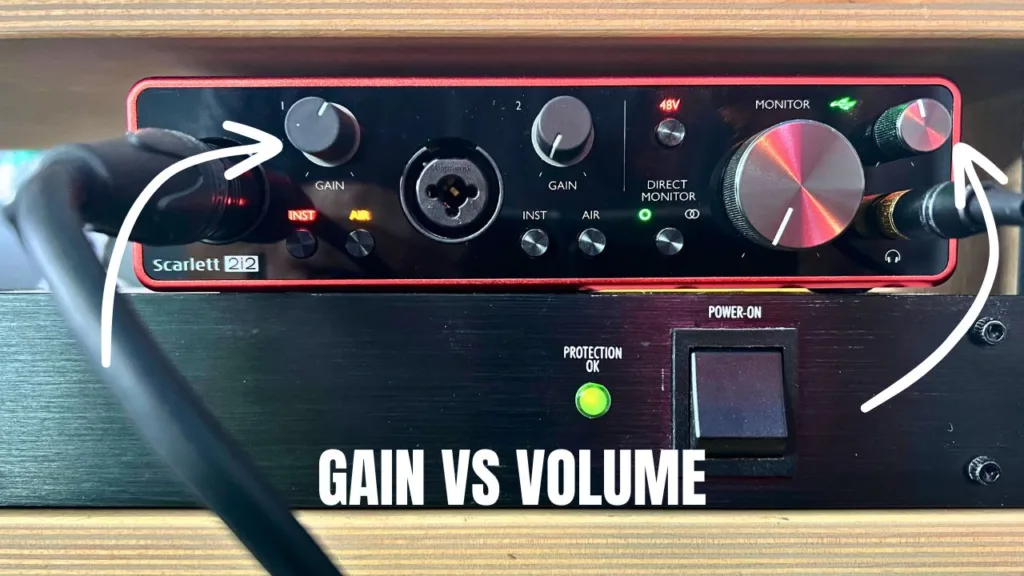
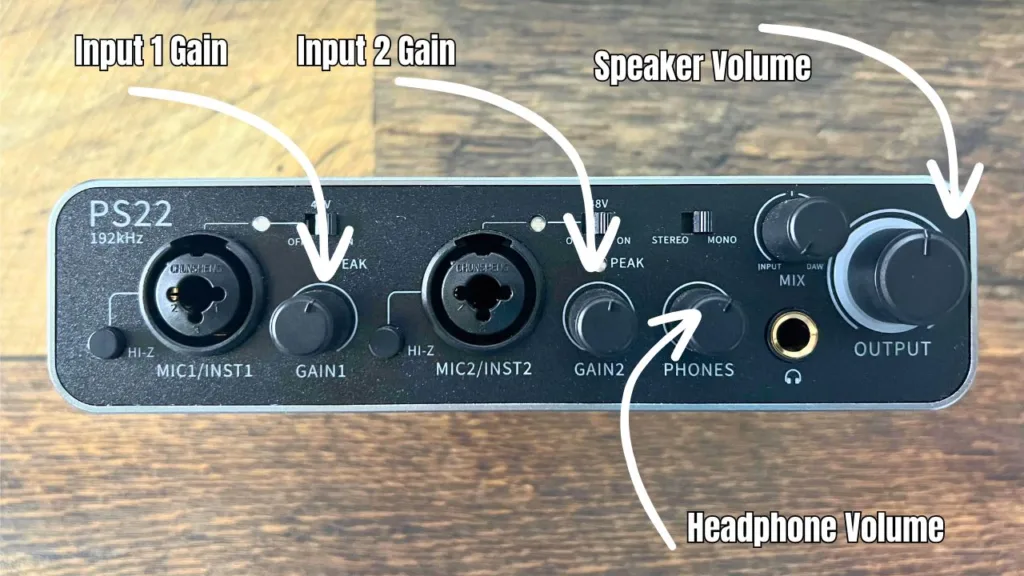
Where Do You Find Gain Controls?
If you are using an XLR microphone to record your podcast, chances are it is plugged into an audio interface.
Within your audio interface there is an amplifier, called a preamp. Typically, there will also be a knob or button to control the gain of the preamp.
The more you turn up the gain, the more powerful your microphone will become. In other words, it’ll start to pick up your voice at a stronger level.
USB microphones have amplifiers built into the mic’s themselves. If you’re recording with a USB microphone you won’t need an audio interface.
Some USB microphones let you tweak their gain via controls on the microphone itself, or via the microphone manufacturer’s software
Also, there are some USB microphones that don’t have gain changing abilities. Instead, they use auto gain. Auto gain USB mic’s automatically adjust to your level of vocal projection.
Regardless of the mic you’re using, dialing in an optimal amount of gain is key for achieving a clean recording.
How To Dial In Gain Levels
So as a general rule, if your audio signal is peaking between -12db and -6db you’re in good shape. In this range your recording won’t be blown out and distorted. Additionally, it won’t be so low that you end having to boost it later.
To see exactly where you signal is peaking, you’ll need to be looking at an audio meter. Audio tracks inside DAW’s have audio meters.
Several higher end audio interfaces have built in metering, but a lot don’t.
Recording without the visual cue of the numbers on an audio meter, can cause some SLIGHT issues. Fortunately, audio manufactures thought of this and developed the color scale.
Clean Gain Preamps
If you’re struggling to achieve sufficient gain without a lot of noise, you may want to consider a gain booster. A signal booster is a device that you connect between your microphone and audio interface to increase the audio signal’s strength.
Cloudlifter

Audio Levels Through Traffic Lights
Green: Accelerate Your Gain
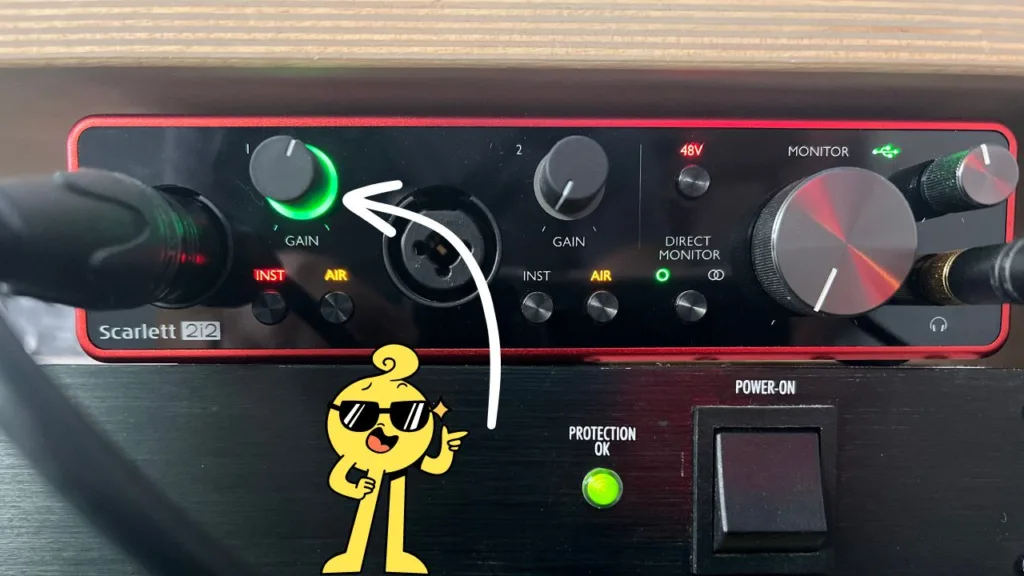
When your audio meter flashes green, it’s all systems go. This is the zone where you have the freedom to push the gain a bit more, ensuring your signal isn’t too timid.
Think of it as cruising through a green light, knowing you’re clear to move forward. However, keep an eye on the road; while green signals a good level, it doesn’t mean you’ve reached your destination.
Your aim?
A sound that’s present and full, without crossing into overbearing territory. Use your ears too!
Yellow: Caution Ahead
Yellow is your gentle nudge to ease off the accelerator. It signifies you’re approaching the threshold where your audio might get “hot.”
In driving terms, it’s that moment when you spot a yellow light and decide whether to speed up to make the light or prepare to stop.
For your gain, it means you’re in the optimal zone but should be cautious not to push further into the red.
It’s about finding that sweet spot where your audio is strong and dynamic, without the risk of distortion. Again, use your ears!
Red: Stop and Assess
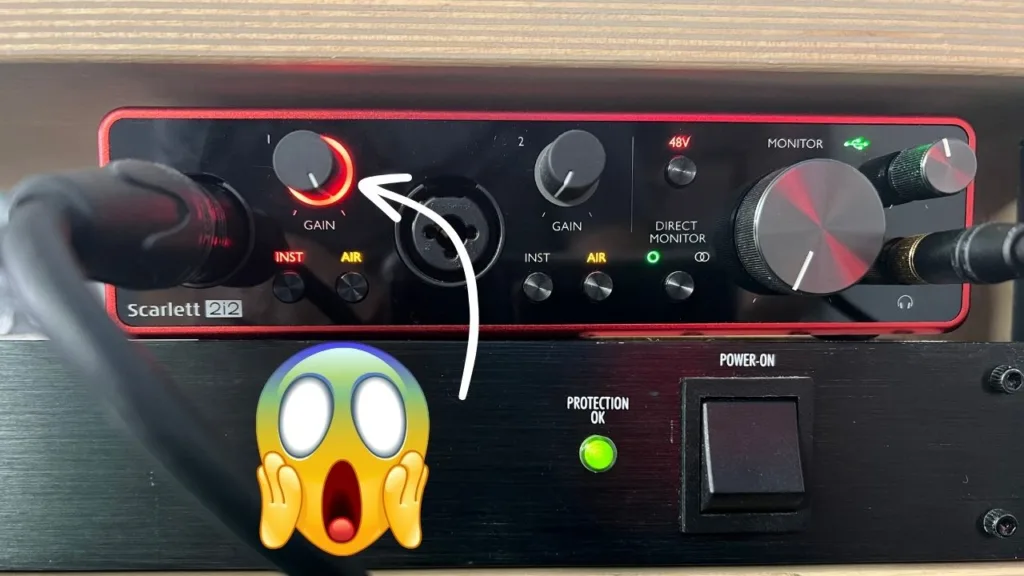
Red in your audio meter is the universal sign to halt. Just as you would at a red traffic light, stop increasing the gain immediately. This level indicates your signal is too “hot,” leading to distortion or clipping—a definite no-go for quality podcast production.
It’s critical to dial back and adjust your settings to ensure a clean, professional sound.
All meters and colors are slightly different.
So, make sure you use this as a guide. The most important thing you can do with audio is to use your ears. Listen to your mic, how does it sound?
Now glance at your level, where is it sitting?
If you’re routinely recording in the same location with the same microphone, memorize this setting. This will be a great place to start for your next session.
The Signal-to-Noise Ratio
The signal-to-noise ratio (SNR) might sound like a complex term, but it’s actually a straightforward concept essential for recording high-quality audio.
In simple terms, the SNR (Signal-to-Noise Ratio) measures the difference between the sounds you want to record, like your voice, and the unwanted background noise.
This background noise can come from your recording environment or from increasing the gain, which also boosts circuit noise.
Finding the Right Signal-To-Noise Ratio
Your goal is to maximize your voice (the signal), while minimizing any background hum, buzz, or distractions (the noise).
Essentially, you should increase your gain until the noise level is just too high for your liking, then back it off a bit.
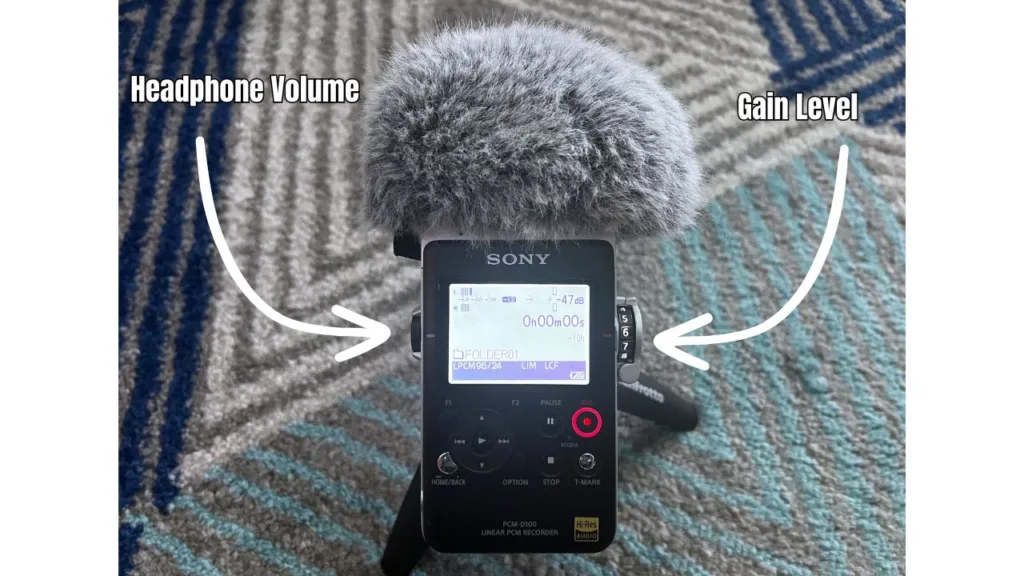
Listening Intently
A crucial step in dialing in the perfect SNR is to use headphones while recording. This might seem like a minor detail, but it’s a game-changer.
Headphones allow you to hear your voice as the microphone captures it, making it easier to adjust the gain and find that sweet spot where your voice is clear and dominant, with minimal background noise.
However, there’s a catch: if you set the gain too high in an effort to overshadow the noise, you risk distorting your voice (a situation where your signal “goes into the red”).
On the flip side, setting the gain too low can make the noise more prominent than your voice.
Adjusting Your Amp Settings
It’s all about finding that healthy balance.
If you notice too much noise in the -12 to -6 dB range, it’s time to tweak your settings.
The aim is to achieve a full, rich sound from your voice without letting noise intrude.
Remember, what you hear through your headphones or speakers at one volume level might not reveal the full picture.
It’s crucial to adjust the playback volume to ensure you’re not missing any subtle noise that could compromise the clarity of your recording.
Gain vs Volume Final Thoughts
Grasping the distinction between gain and volume is vital for any podcaster aiming to produce high-quality audio.
This understanding not only enhances your control over the recording process but ensures that your listeners enjoy a crisp, clear listening experience.
By setting the right gain levels, you minimize background noise and distortion, capturing the true dynamics of your voice. Moreover, by managing volume effectively, you maintain the integrity of the sound as it reaches your audience, regardless of their playback settings.
Incorporating these techniques allows you to achieve a balanced signal-to-noise ratio, essential for professional sounding podcasts.
This balance is the crux of the gain vs volume dynamic, a foundational aspect of audio recording that affects the final output of your content.
Remember, a well-calibrated gain setting not only preserves the quality of your audio but also gives you more flexibility during post-production, making any additional adjustments more effective.
Perfecting your approach to gain vs volume will not only enhance your technical skills but also elevate the overall listening experience, proving that the nuances of audio management are pivotal to successful podcast production.
Connect With Us:
- The Podcast Haven Homepage
- Our YouTube
- TikTok
- Listen To Our Flagship Podcast CLIPPED on Apple Podcasts
- Listen To Our Flagship Podcast CLIPPED on Spotify